Have you ever been out on a ride and suddenly your motorcycle refuses to turn on? You may be experiencing an issue with your ignition switch. A failing ignition switch can cause all sorts of problems, from reducing the power output to making it difficult to start the engine.
Fortunately, there are ways to bypass the ignition switch if needed. In this article, we’ll explore how to diagnose and bypass the ignition switch on a motorcycle safely and efficiently.

To illustrate, consider the case study of John who experienced an issue with his bike not starting after a long ride in hot weather. After some troubleshooting, he was able to determine that his ignition switch had gone bad and decided to bypass it in order to get back on the road quickly.
Follow along as we show you how John solved his problem and how you can do the same for yours!
Key Takeaways
- Ignition switch issues can cause starting problems and reduced power output on motorcycles.
- Checking the battery’s charge level and condition is important before bypassing the ignition switch.
- Regular inspection and maintenance of spark plugs is necessary for optimal bike performance.
- Testing and checking the connections and functionality of the ignition coil, wiring, and circuits is crucial for troubleshooting ignition switch problems.
Check the Battery
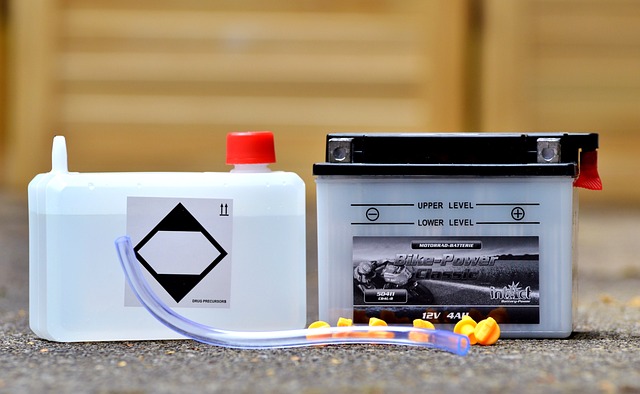
Before you attempt to bypass the ignition switch, make sure to check your battery’s charge level – it could save you a lot of hassle! First, test the voltage with a multimeter and evaluate its condition. If the voltage is below 12 volts or if there are signs of corrosion, then the battery needs to be replaced.
Otherwise, ensure all cables are secure and that none of them have been cut or damaged in any way. Also, check for any shorts in the system that could be causing issues with the ignition switch. While examining these components, take note of their overall condition so they can be replaced if necessary.
Lastly, inspect any additional wiring related to the ignition switch and make sure it’s functioning properly before attempting to bypass it.
Check the Spark Plugs
To ensure your motorcycle is running correctly, it’s important to check the spark plugs. You can test for spark by connecting a spark plug tester or timing light and cranking the engine – if the tester flashes, you have spark. If not, you’ll need to clean or replace the plugs as needed until you get an appropriate response.
Keep in mind that replacing your spark plugs regularly is essential for keeping your bike in optimal condition.
Test for Spark
Check the sparkplug to see if it sparks when you turn the ignition. To do this, examine the connections between the spark plug and wires from the ignition switch.
Then, test for voltage by attaching a multimeter to each of the wires connected to the spark plug. If there’s no current or an insufficient amount of voltage, then your motorcycle’s ignition switch may be malfunctioning.
Here are some tips for testing your motorcycle’s ignition:
- Examine Connections:
- Check that all connections are secure and properly in place.
- Make sure that any corrosion on electrical components is removed with a wire brush or other appropriate cleaning tool.
- Testing Voltage:
- Use a multimeter to accurately measure voltage across each connection point.
- If necessary, adjust settings on the multimeter for maximum accuracy in measuring voltage levels.
Clean or Replace as Needed
If the connections and voltage levels are off, it’s time to clean or replace parts – don’t wait until it’s too late! Repair techniques should be employed in order to properly bypass the ignition switch on a motorcycle.
This includes cleaning any dirt or debris from the contacts and replacing them if necessary. Safety precautions must also be taken when handling the ignition switch, as not doing so can lead to serious injury.
When replacing parts, make sure to use ones that are specifically designed for your particular make and model of motorcycle. Be aware of all wiring connections before attempting any work on the ignition switch and ensure they are secure at all times. Doing so will help minimize any risks associated with bypassing the ignition switch on a motorcycle.
Check the Ignition Coil
It’s worth seeing if the ignition coil is in working order, as it could be the culprit behind your ignition switch woes.
To check this, you’ll need to first locate the alternator connections and inspect for any faulty wiring.
If all looks good, then next take a reading of the primary and secondary coils with an ohmmeter. The meter should read between 1-2 ohms for the primary coil and 6,000 to 18,000 ohms for the secondary.
If either of these readings are outside of this range, then it’s likely that the ignition coil has gone bad and needs replacing.
Once you have done these checks and determined whether or not your ignition coil is in working order, you can move on to other possible causes of your ignition switch issues.
Check the Ignition Switch
In order to check the ignition switch, it’s important to test the connections and check the wiring.
Start by inspecting all of the electrical connections leading to and from the switch for any signs of corrosion or damage.
Once this has been done, trace each individual wire from its source to its destination in order to ensure that there aren’t any breaks in continuity.
If any problems are found in either step, they’ll need to be addressed before further testing can occur.
Test the Connections
Testing the connections is a crucial step in bypassing your motorcycle’s ignition switch–so don’t skimp on it! To diagnose problems and test continuity, you’ll need to remove the existing wiring harness from the switch. Before doing so, use a digital multimeter to check for any voltage readings coming from the wires. Then, look at the contacts on each side of the switch itself. Make sure they’re not corroded or loose before proceeding.
| Wire | Color | Voltage Reading |
|---|---|---|
| Battery+ | Red | 12V |
| Battery- | Black | 0V |
| Starter | Blue | 12V |
| Accessory1 | Green | 5V |
| Accessory2 | Yellow 0V |
Check the Wiring
Check your wiring to ensure an optimal connection. It’s estimated that up to 80% of electrical problems are related to incorrect or loose wiring, so it’s important to take the time to check your connections and test circuits.
Start by inspecting each wire individually for any frays, cuts, or damage. Make sure all wires are securely connected and check their insulation for any signs of wear or tear. If you find any issues, replace the wire with a new one and make sure it’s properly grounded.
Once all wires have been checked, use a multimeter or other testing device to test each circuit in order to verify its continuity and proper functionality. Doing this will help you identify any potential problems before they cause further damage, saving you time and money in the long run.
Check the Starter Circuit
In this discussion, we’ll be focusing on the starter circuit. Specifically, we’ll be looking at how to check the starter relay and starter solenoid.
To begin, it’s important that you have a good understanding of both components in order to properly diagnose any issues with them. You should also take into account the wiring diagrams of your particular motorcycle model when troubleshooting these two parts.
With this knowledge, you can easily locate and diagnose any potential problems with the starter circuit on your bike.
Check the Starter Relay
Examining the starter relay is a necessary step to bypassing the motorcycle’s ignition switch. It’s important to first check for any mechanical issues, such as a broken wire or loose connection, that may be obstructing the proper functioning of the relay.
Additionally, it’s essential to look out for any electrical faults that could be causing an issue with its power supply. Some common electrical faults include a poor power supply and corroded contacts.
- Mechanical Issues:
- Broken Wire
- Loose Connections
- Electrical Faults:
- Poor Power Supply
- Corroded Contacts
Check the Starter Solenoid
Now that you have checked the starter relay, it is time to move on to the starter solenoid. The starter solenoid is a critical component in bypassing your motorcycle’s ignition switch. Testing and troubleshooting this part of the system will require some knowledge of electrical systems and components. To help you out, here is a table outlining the steps necessary for testing and troubleshooting your starter solenoid:
| Step | Troubleshooting | Testing |
|---|---|---|
| 1 | Check wiring | Test voltage at terminals |
| 2 | Clean contacts | Measure current flow |
| 3 | Replace relay | Check resistance |
| 4 | Test battery |
Following these steps should get you well on your way to bypassing your motorcycle’s ignition switch!
Check the Starter Button
To bypass your motorcycle’s ignition switch, it’s time to take a closer look at the starter button. Imagine it as the key that’ll unlock your engine and get you back on the road.
Check the circuit around the starter button, making sure there’s nothing blocking its connection. If you find any issues with wiring or loose connections, troubleshoot them immediately. Make sure all wires are firmly attached and no corrosion has been left behind.
Inspect any fuses in the circuit to ensure they’re working correctly. If everything looks ok, then press down on the starter button and see if your engine turns over. If not, repeat these steps until you can get your motorcycle running again.
Bypass the Ignition Switch
If you want to get your engine running again, you’ll need to find a way around the obstacle blocking its ignition–bypassing the motorcycle’s ignition switch. To do so:
- Troubleshoot diagnostics, such as loose wiring connections and corroded battery terminals.
- Disconnect the negative terminal of the battery and then reconnect it after 10 seconds have passed.
- Check all fuses associated with the motorcycle’s electrical system.
- Utilize a bypass process, such as installing an on-off toggle switch in place of the original ignition switch.
By completing these steps precisely and carefully, you can get your engine running without having to replace or repair any components.
Frequently Asked Questions
What type of battery do I need for my motorcycle?
You need a battery that can handle regular maintenance and charging methods. Metaphorically speaking, think of it as the heart of your motorcycle – reliable, powerful, and capable. Consider the amperage ratings and the life expectancy of the battery to make sure you get one that best suits your needs.
How do I test the spark plugs?
To test spark plugs, check the spark gap with a feeler gauge and inspect the motor condition. Ensure the gap is within manufacturer specifications. Use a multimeter to measure voltage while cranking the engine. If no voltage, replace plugs and recheck.
How do I know if the ignition coil needs to be replaced?
If you suspect a faulty ignition coil, diagnose the fault by inspecting wiring and connections for signs of damage or corrosion. Test the coil to determine if it needs replacing.
What is the best way to check the ignition switch?
To troubleshoot and check the ignition switch, use a multimeter to test for continuity and measure voltage. Be sure to take safety precautions such as disconnecting the power source before starting.
How do I troubleshoot the starter circuit?
Troubleshoot the starter circuit by checking for starting issues and ignition troubleshooting. Inspect the wiring, connections, and components to identify any problems. Test the battery voltage and use a voltmeter to measure power flow through the system.
Conclusion
You’ve done the hard work of checking your battery, spark plugs, ignition coil, and starter circuit. Now it’s time to bypass the ignition switch.
With a few simple steps, you can get your motorcycle running in no time! One interesting statistic to keep in mind is that motorcycles with an electronic ignition system can last up to 10 times longer than those without one.
Bypassing the ignition switch on your motorcycle is a great way to ensure longevity and reduce repair costs down the line.